Starting Your Green Horse Over Fences: Three Introductory Exercises
This article originally appeared in the May/June 2005 issue of Eventing USA magazine.
At the risk of stating the obvious, most of us who event do so because we enjoy jumping. But most of us could stand a bit of improvement, whether in the way we ride, in the way our horse goes, or both. Additionally, most of us will at some point be faced with the task of starting a green horse or re-schooling a horse that has developed problems over fences. The depth of experience and understanding of all the nuances that accompany jumping horses are beyond the breadth of any article. They in fact encompass a lifetime of learning. But a few tips along the way can make the path a little easier to travel and prevent the need to constantly reinvent the wheel. The purpose of this series of articles is to help point the way toward safe, consistent jumping with an emphasis on starting the young horse, beginning with the tack required, the jumps needed, and the exercises appropriate to green horses.
Before ever beginning to jump, we need to first look at the tack and jumps needed to be successful. For our purposes, plan on using a comfortable saddle, a bridle with flash noseband and snaffle bit, a breastplate, a jumping stick, and possibly a standing martingale. In order to set the jumps needed for the exercises, you will need five sets of standards, 12 poles, 24 jump cups, and four flower boxes.
Placement of the Jumps
Jumps placed randomly will give you random results, but there is nothing random about successful training. Your five sets of standards provide enough jumps to set one vertical and two oxers.
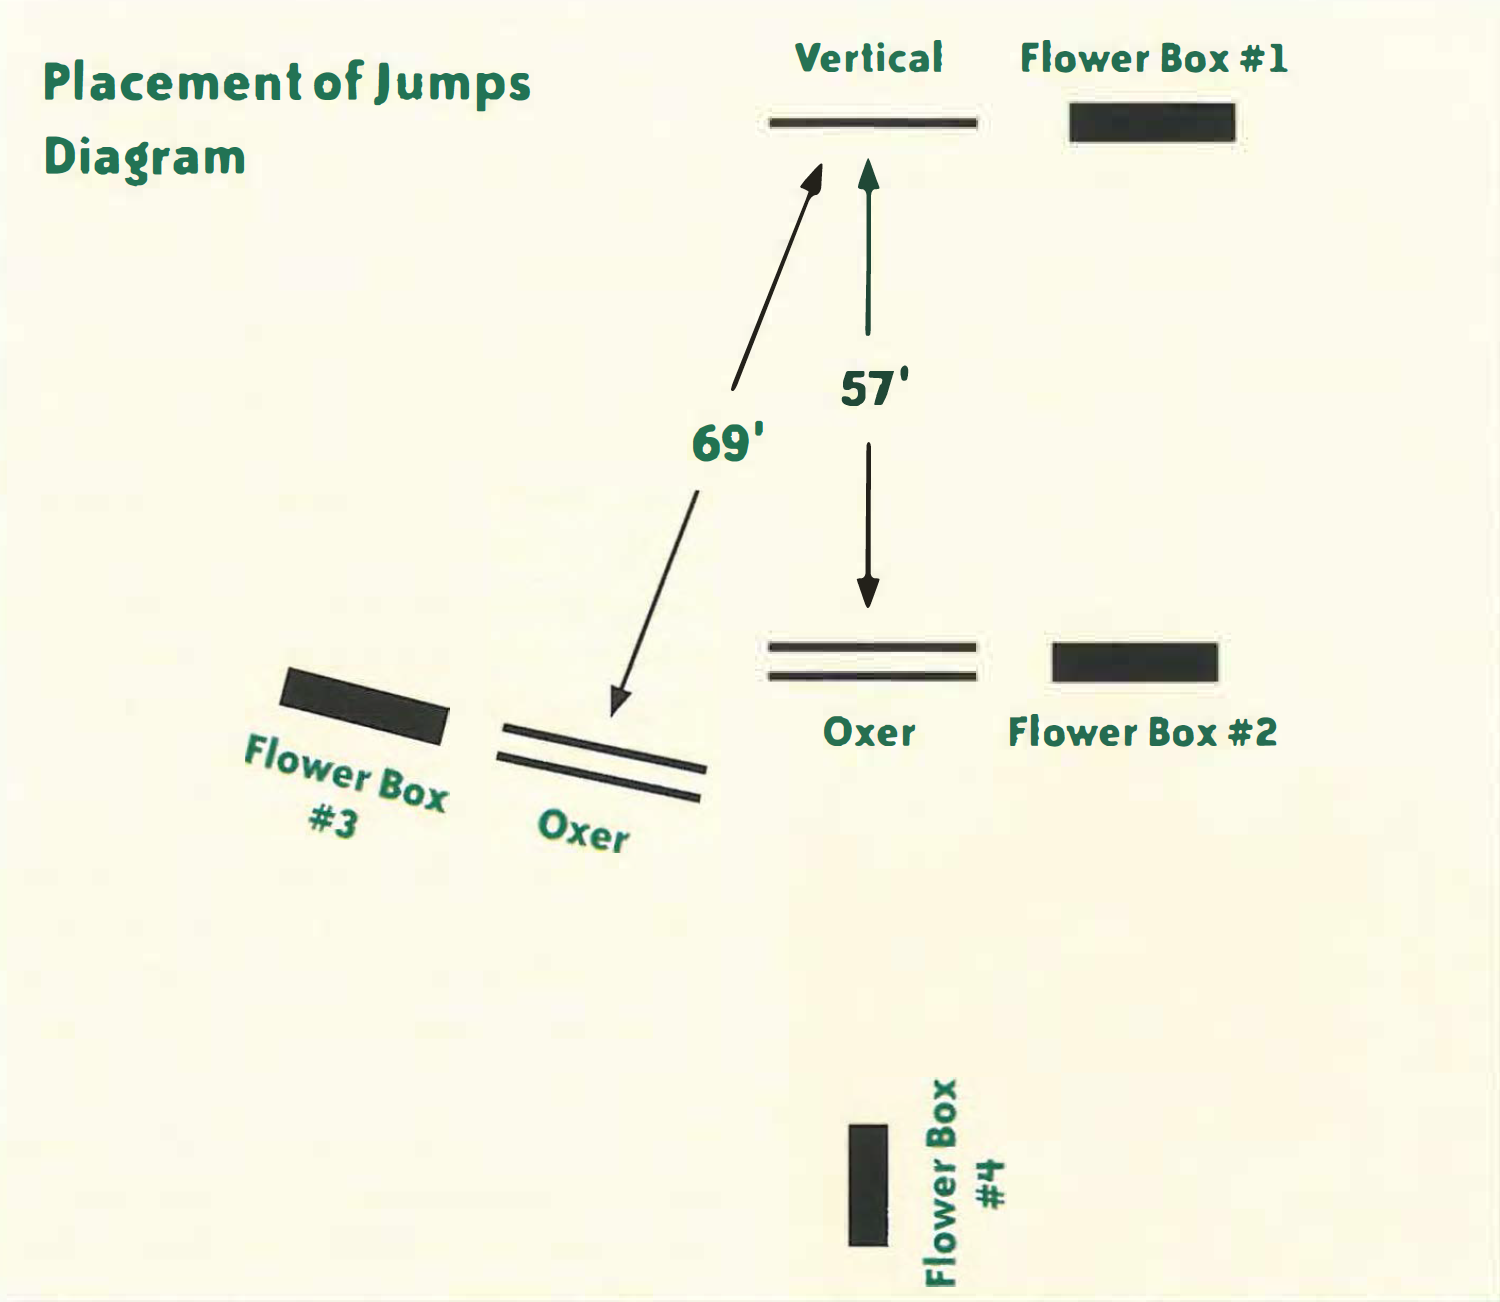
To begin, set the vertical. Place it in such a way that it will be easy to get to at the trot and canter. From the vertical, walk or measure a 57-foot straight line and set an oxer. If you trot the vertical into the line and canter out of the line over the oxer, the average horse will take five strides. If you canter the vertical and continue at the canter to the oxer, the average horse will take four strides. For every 12 feet you move the oxer further from the vertical, the average horse will add one more stride. For every 12 feet you subtract from this line, the average horse will take one less stride. As a basic rule of thumb, stick to this guide: for one stride between two jumps, 21 feet to 24 feet. We are using the lower number in this article, as most green horses don't jump into a line boldly, and we will be doing considerable trotting into the line. For every stride after that, add 12 feet. When you get up beyond nine or ten strides, don't bother counting anymore. These numbers work on either a straight or bending line.
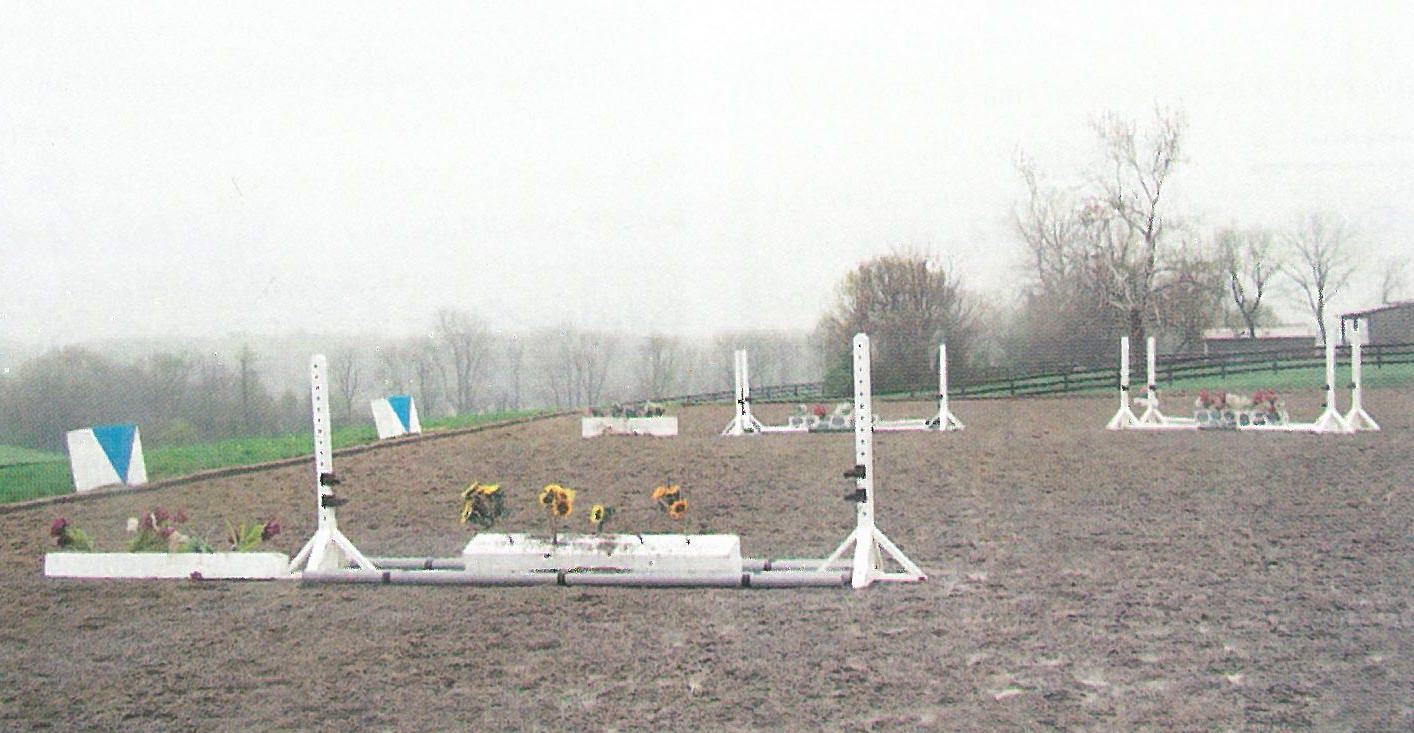
With your remaining standards set a second oxer to the right of the first, but on a slightly bending line from the vertical on 69 feet. For the time being the poles can be placed directly on the ground. Set one of your flower boxes next to the vertical and one next to each oxer, mimicking the placement of the jumps. Place the fourth flower box at one end of your ring perpendicular to the oxer/vertical line, but far enough away so as not to interfere with the approach to any of the jumps. This is the course that we will use for each of the exercises in this and subsequent articles. Your jumps are now ready for your first school.
The Jumps
The jumps we use to school horses come in a variety of shapes and sizes. While an entire set of show jumps isn't necessary, this series of articles is based on a minimum of five pairs of standards, four flower boxes, and 12 poles with enough jump cups to hold all the poles. The cups should be of high enough quality to not bend easily with use. The poles should be made of wood and heavy enough that if a horse hits one, it stings a bit, thus encouraging him to avoid hitting it a second time. Also, heavy poles are less likely to roll if knocked. Plastic PVC pipe does not work well for jump poles, as it is too light and smooth. Horses generally don't mind hitting it enough to be effective, and there is the danger of the horse rolling the pole and tripping himself. Flower boxes come in a variety of heights and widths. A useful dimension would be eight feet in length, eight to 16 inches tall, and six to 12 inches wide. Stuff them with bright plastic flowers to really give your horse something to look at when schooling at home, then he won't think twice about them at events.
A ring is obviously an ideal place to set the jumps. If one is not available, consider using a fenced paddock or pasture. If a fence line is not available, consider placing the jumps near a tree line or other natural barrier. I once saw a perfectly useful schooling area in Argentina bordered completely with round bales. Avoid placing the jumps in the middle of a huge field. Young horses wander easily enough, tend to steer less than we would like, and can take advantage of wide-open spaces to their benefit and our detriment.
Editor's note: Though these photos do not illustrate this point, it is a good idea to remove jump cups from standards when no rails are being used.
The Tack
No one piece of tack will ever provide a silver bullet for riding well, but the correct pieces of tack can make the job easier. Saddles are expensive. With the exception of professionals, most riders only have one. So make it a good one. For eventing, though we have three distinct phases, it's perfectly acceptable to use the same saddle in each phase. Since two of those phases are jumping, it should be a jumping saddle. As a rule, most all-purpose saddles miss the mark of serving any purpose. Also, keep in mind that it is more than acceptable to do a dressage test in a show jumping saddle, particularly at the lower levels and on young horses. Find a saddle that is comfortable to sit in, made of high quality leather, and has a slight, soft knee roll.
For jumping, your bridle should include rubber reins, a flash noseband, and some variation on the snaffle bit. When fitting a flash noseband, keep in mind that it is not ornamental. The cavesson portion of the noseband should sit just below the horse's cheekbone, which then positions the flash strap appropriately.
While not allowed for use in competition, don't be afraid to borrow from other disciplines when schooling a young horse, or re-schooling a difficult horse, and consider the use of a standing martingale. The standing martingale is comprised of a strap that attaches to the girth between the horse's front legs and to the cavesson portion of the noseband. It is a simple, effective method to discourage the horse from putting his head in your face. It has the added benefit of being easily understood by the horse - at rest, he doesn't even know the standing martingale is there. When he tosses or raises his head, he meets resistance on the bridge of his nose. When he yields to the resistance, the martingale drops out of play. It's about as simple a cause-and-effect, stimulus-and-response aid as is imaginable. Use it at home to start a horse and you'll most likely never miss it at a competition. And you can avoid having your nose smashed.
One piece of tack that is often missIng from amateur riders' tool chests is a breastplate. A breastplate is next to useless for holding a saddle in place, for that try a no-slip pad, an over-girth, or both. What a breastplate does provide, however, is a place to hook a finger, which can be just enough to keep you in the middle of the tack and off the ground while your horse is bolting left or right, which green horses are prone to doing. A breastplate is appropriate for every phase of competition, not just schooling, and can be used in conjunction with a standing or running martingale.
One last essential item is a jumping stick. Carry a stick not because you're going to beat your horse over the jumps, though the stick can provide a necessary back up to the leg, spur, or voice, but because it can actually help you steer a horse that doesn't know much about steering. If your horse drifts or cuts left, carry your stick in your left hand and tap it against his left shoulder. If your horse wanders right, carry the stick in your right hand for the same purpose.
Assemble a good jumping saddle, standing martingale, breastplate, flash noseband, rubber reins, snaffle bit, and a stick. Then you are ready to jump.
Exercise 1: On the Flat
This exercise is geared to a horse that has very little or no jumping experience, perhaps a horse that is just recently off the track or only recently broke. With your tack in place and well adjusted, start by trotting around the schooling area. In order to jump well, a horse and rider must first be calm. To help yourself and your horse relax as you trot around, reach forward with one hand, still holding the rein, and stroke your horse's neck. If your horse speeds up when you do this, take the rein back again. Then reach up and stroke the neck again. A relaxed rider will have a soft, relaxed forearm and fingers. A relaxed horse will allow you to stroke his neck without getting quicker. If your horse quickens when you stroke his neck, don't stop stroking his neck. Instead, take the rein back, slow the trot, and try again. Use your voice to help slow him, saying out loud (not just to yourself), "Whooaa." At this point, don't be afraid to even slow to the walk for a couple of steps in order to help clarify for the horse what you want.
As your horse relaxes, add a little spark to the trot by going forward for a few steps (asking gently with your leg if your horse tends to be on the tense side). Then slow the trot for a few steps. Each time you add spark, go a little more forward. Each time you slow the trot, try to come back more. Throughout this exercise on the flat, going forward and coming back, try to be conscious of your horse's body. Does he continue to travel in a straight line when you go forward? Do his haunches shift to one side or the other when you come back? Your horse needs to stay straight during this exercise in order to stay straight when you start to jump. If he wanders when you so forward, try putting your eye on a particular point in the schooling area and riding forward to it. If his haunches swing left when you come back, close your left leg a bit; if they swing right, close the right leg a bit. Your goal is to create a relaxed, regular, straight horse on the flat before you jump.
Exercise 2: Over the Jumps
When your horse is more relaxed, regular, and straight than when you first entered the schooling area, you may begin to jump. Note that your horse doesn't have to be perfectly relaxed, regular, and straight, only more so than when you started. If you wait until he is perfect on the flat, you will never get around to jumping. Also, keep in mind that you don't have to be perfect either. There is a lot of trial and error in both training horses and learning to ride. Don't be afraid to get it wrong a few times on your way to getting it right.
Exercise 2 is easy, and if you follow the progression from one exercise to the next, all the exercises are easy. That's an important thing to remember because both horses and riders need to allow the easy things to be easy. If we let trotting a flower box be easy, then trotting a vertical becomes easy. But if we make trotting a flower box difficult, then trotting a vertical becomes next to impossible and cantering an oxer leaves the realm of possibility. So, Exercise 2 is to trot the flower box on the ground next to the first vertical we set, going away from the oxer so as to avoid pointing the horse at the second flower box. The single flower box is a great place to start because it is low enough for a horse to step over at the walk or from a standstill if necessary, but also narrow enough that the horse must focus on the box and we must ride accurately.
As you trot to the box the first time, keep track of what the horse is doing underneath you. In the ideal world, the relaxed, regular, straight horse that you created on the flat will remain relaxed, regular, and straight, to, over, and away from the box. In reality, however, most horses will try to go right or left, come to a dead stop, or bolt forward once they realize that we are pointing them at an obstacle. Keep in mind that they most likely will veer away from the standard that is next to the flower box, so according to our placement of jumps, that means that the standard is on the left of the flower box and the horse will most likely cut right. Put your stick in your right hand and ride for left of center on the box. If your horse is perfect, he will trot to the flower box and step over it, landing just as straight, regular, and relaxed as he was in the approach. If he is like every other horse in the world, he'll stare at the flowers, try to run out to the right, and bolt away on the other side. Welcome to Horses 101. Now what? If your horse ran out or cut right, be quick on landing to move him over from your right leg and with the stick on the right shoulder. If he bolted, land and halt promptly - not 20 strides away, but one or two strides away.
Then trot the box again the same direction. If your horse cut right the first time, try to close off that side of his body as you approach the box by using your right leg and stick to move him left even as you approach the box. If he was quick and worried the first time, as you approach the box the second time slow him just like you did while riding him on the flat before starting to jump, even approaching at the walk if necessary. The second time should be better than the first - more regular, straighter, calmer, though most likely still not exactly what you're after. Don't give up, though, but instead trust that what you are doing will make sense to the horse. Try the box the third time. Don't be surprised if your horse changes a little bit each time you trot the box, one time trying to run out, the next time jumping high into the air, a third time landing and bolting. If you consider the flower box a puzzle to be solved, most horses will try several different answers before settling on the simplest answer, staying straight, regular, and relaxed. And remember, we want the simple answer.

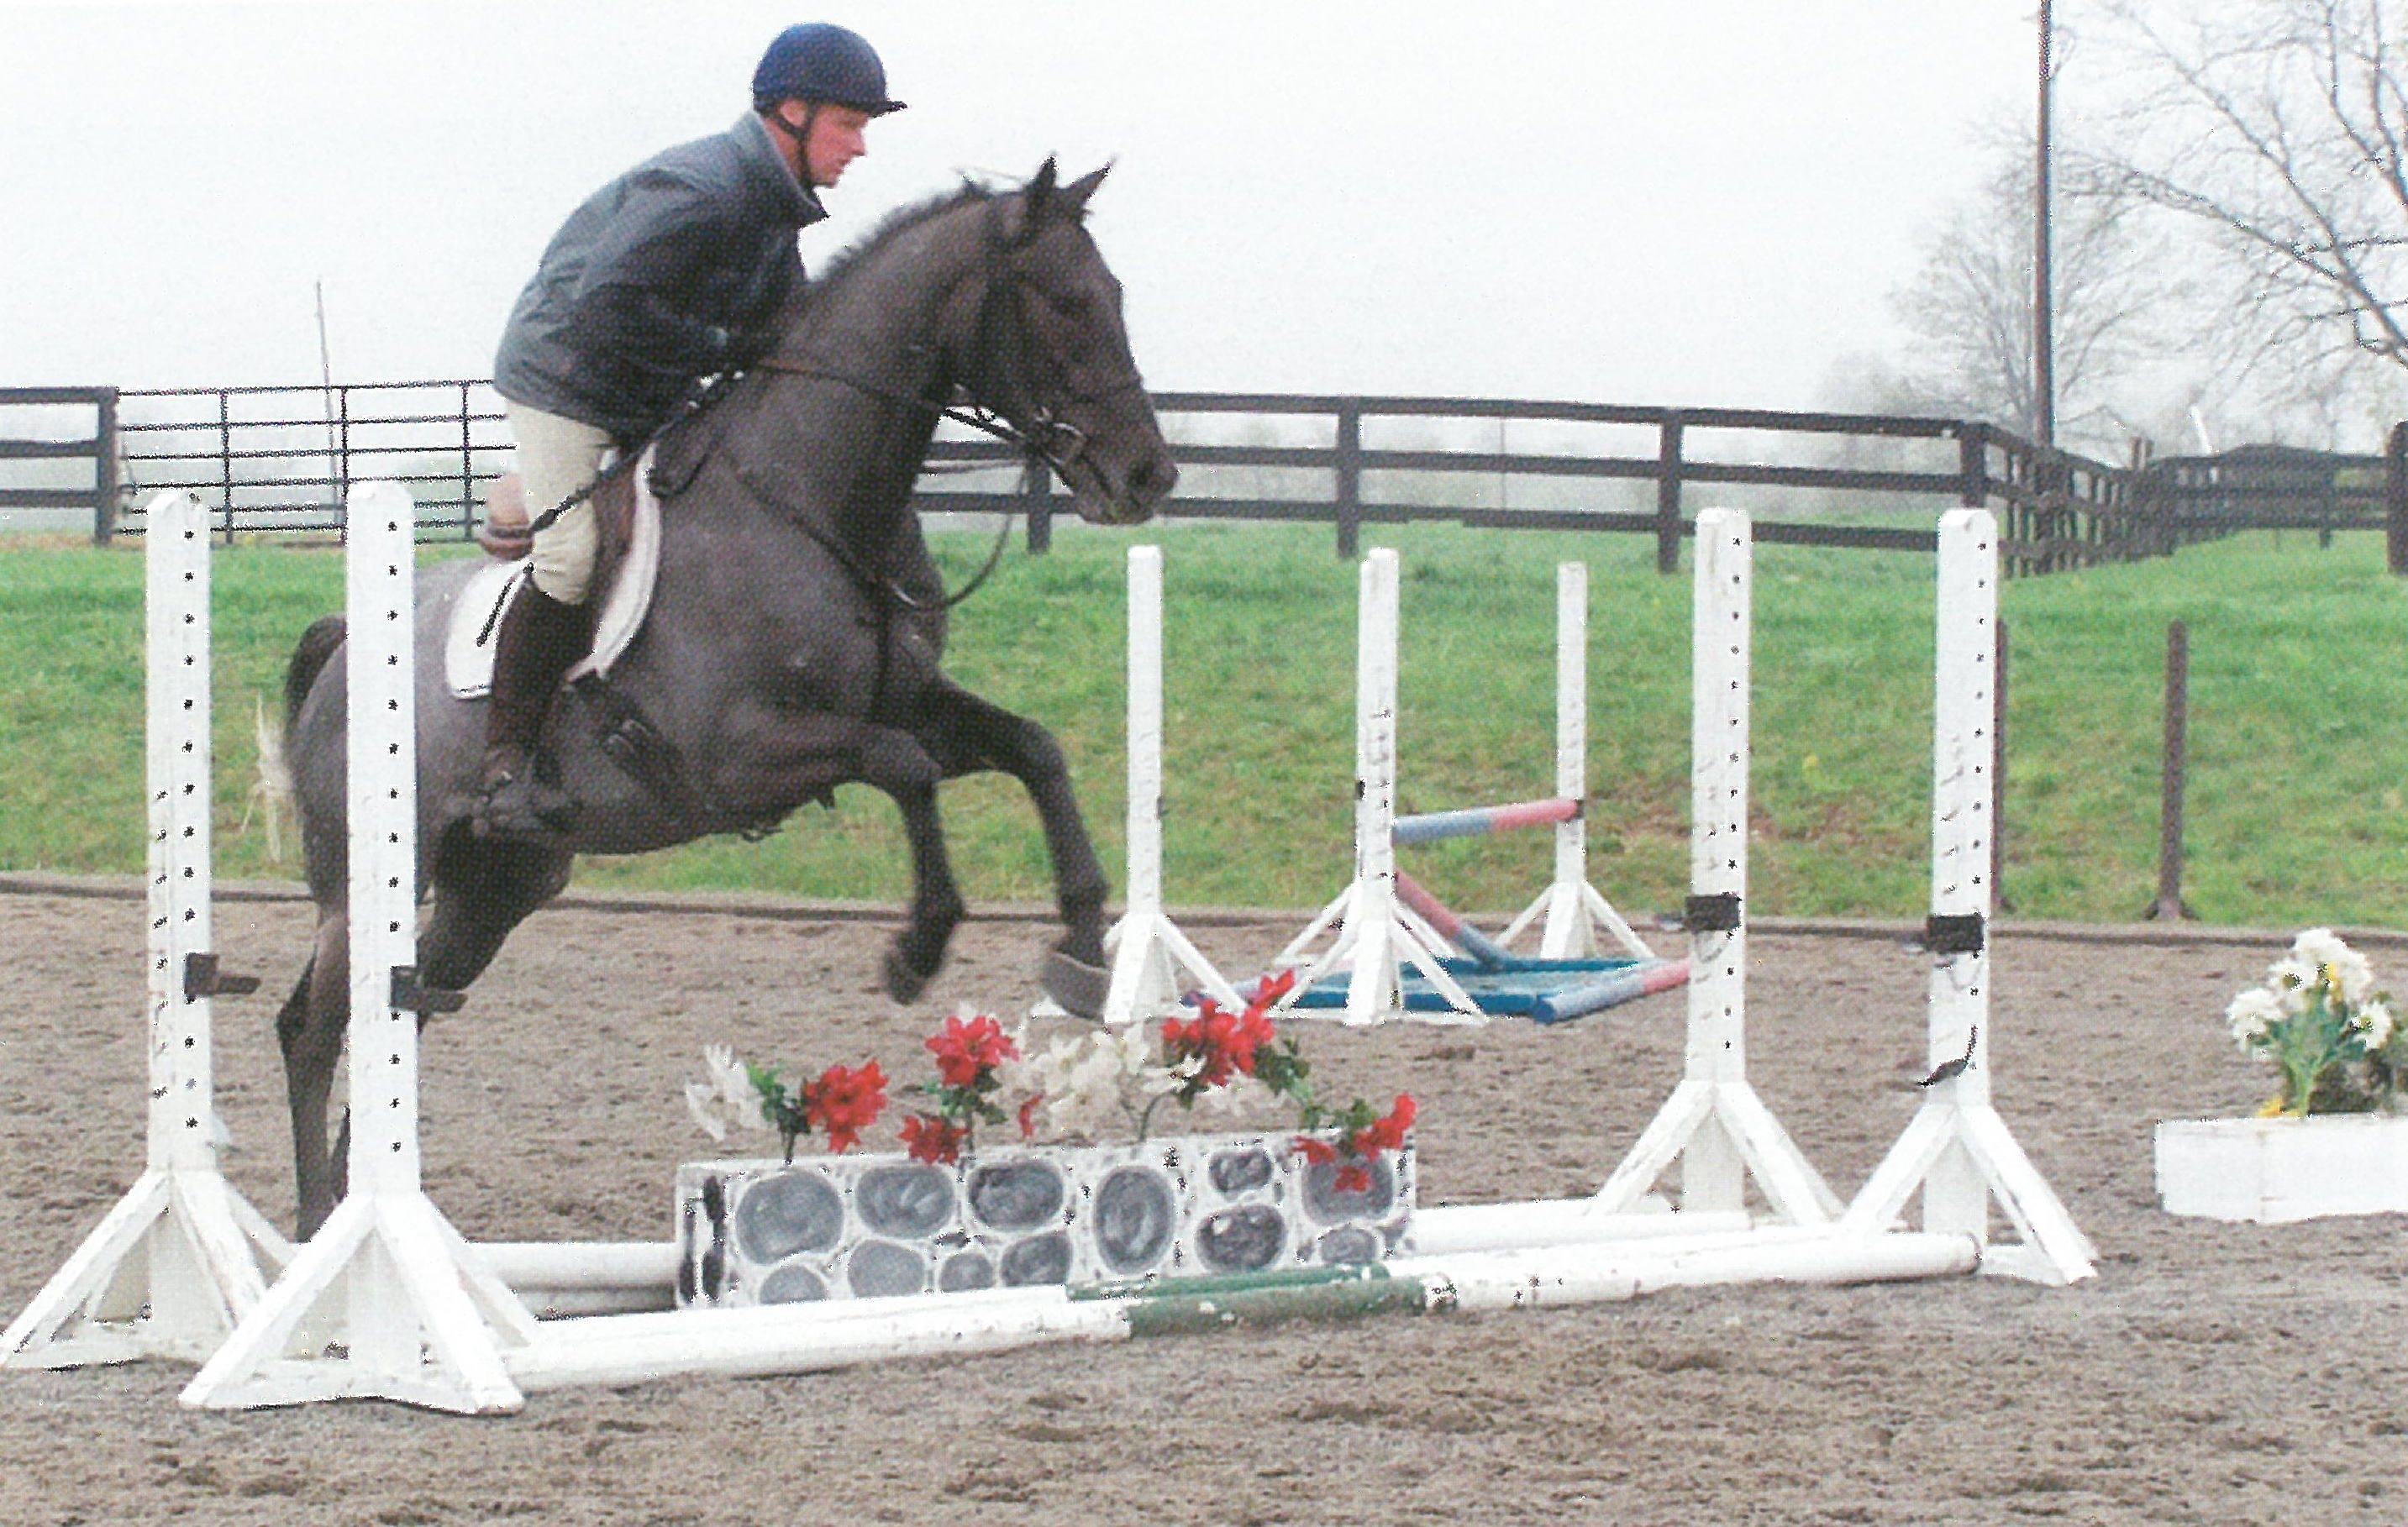
In this picture I have trotted to the flower box that is next to our vertical, and into the line. I know that the standard will help frame in the flower box, so if Honor wants to try to skip past the box, he will do so by going to my left. With this in mind, I have my stick in my left hand and ready to tap on his shoulder if necessary. Note that I have used a standing martingale and a finger of my right hand is hooked into the martingale strap. I don't know what Honor is going to think of jumping, but I want to stay in the middle of him regardless of his movement. My leg is securely on his side, though my eye should be looking where he is - down the line to the next box.
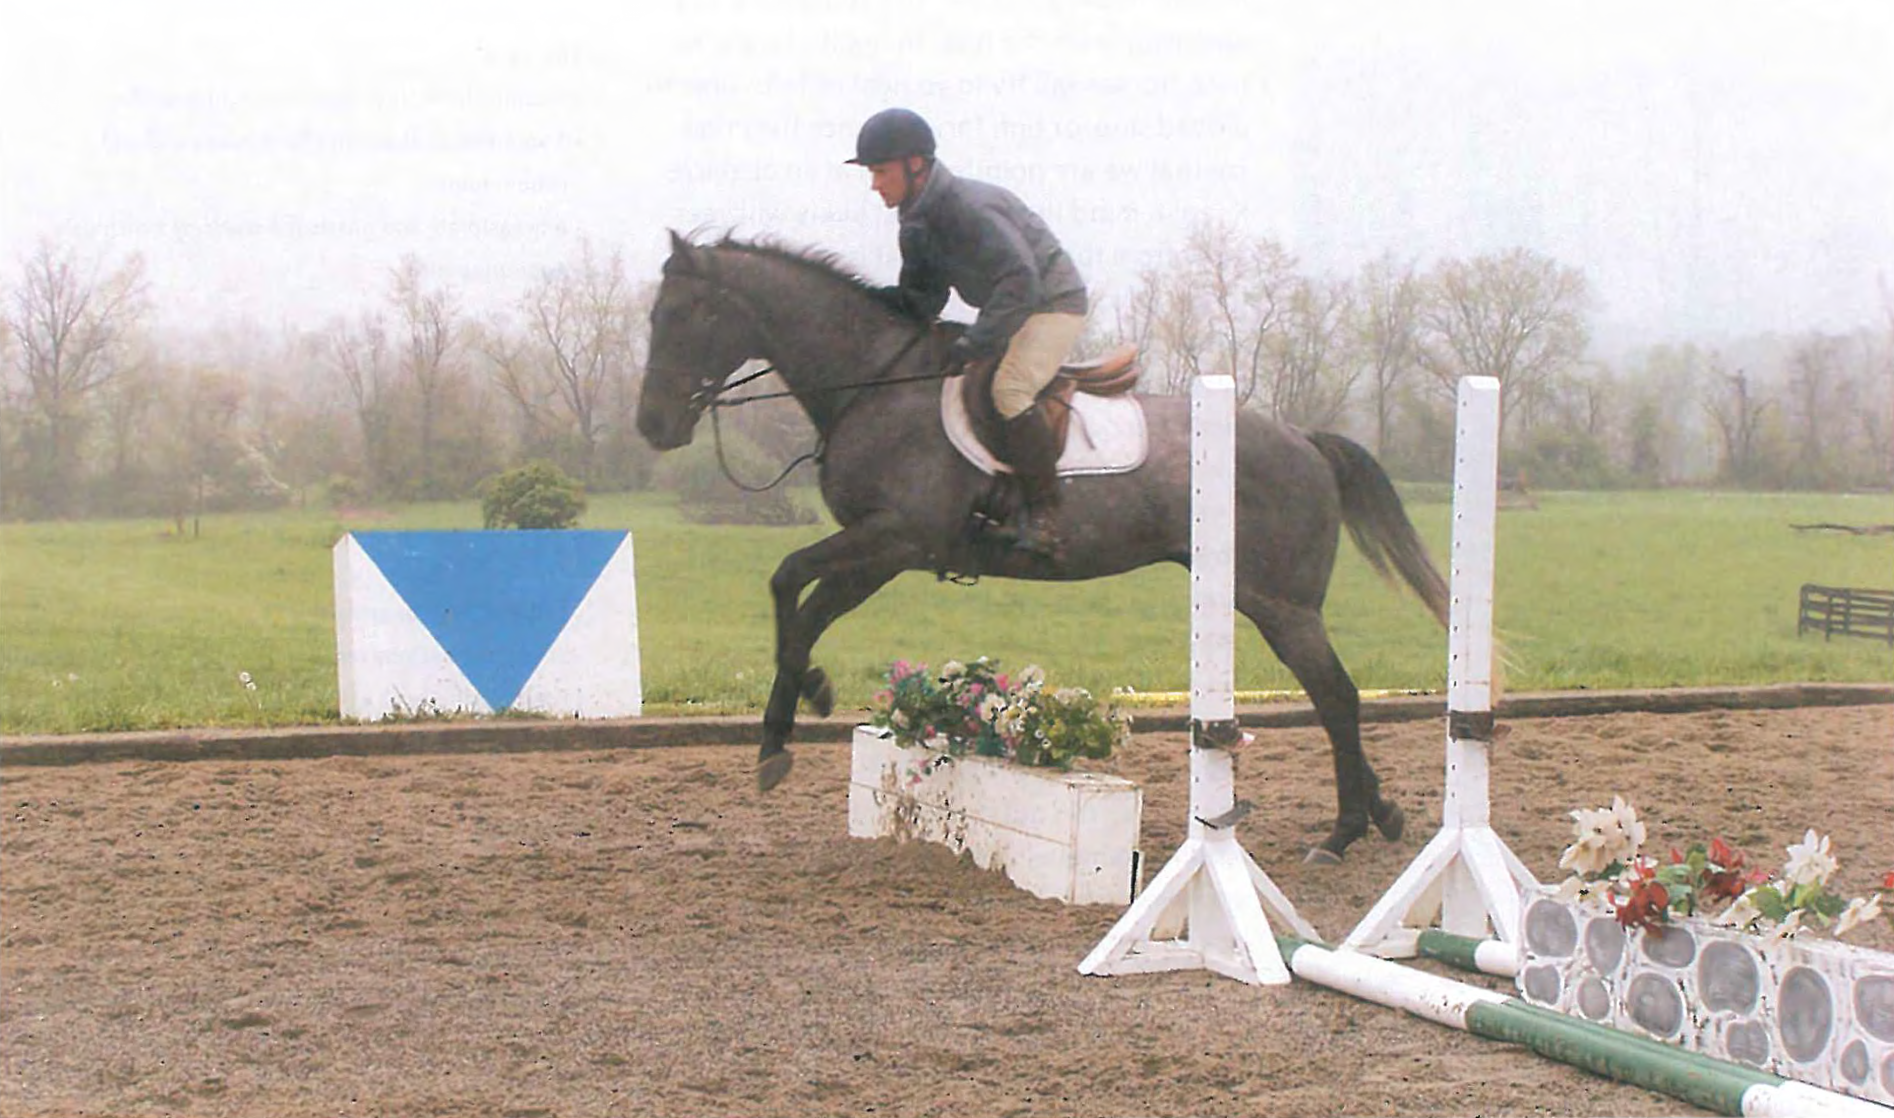
This picture brings us to the next box. Honor handled the first well and landed at a canter. Because he is not a terribly forward-thinking horse - if anything he is a bit lazy - I have encouraged him to go forward and keep the canter down the line. I'm still right in the middle of him with my leg closed and looking toward where we are going. His hind feet haven't planted yet, and I don't know how he is going to handle jumping the flower box, so my position has remained centered in the middle of him. I don't want to be behind the motion, but there is no need for me to make a big move with my upper body over what is a very small jump
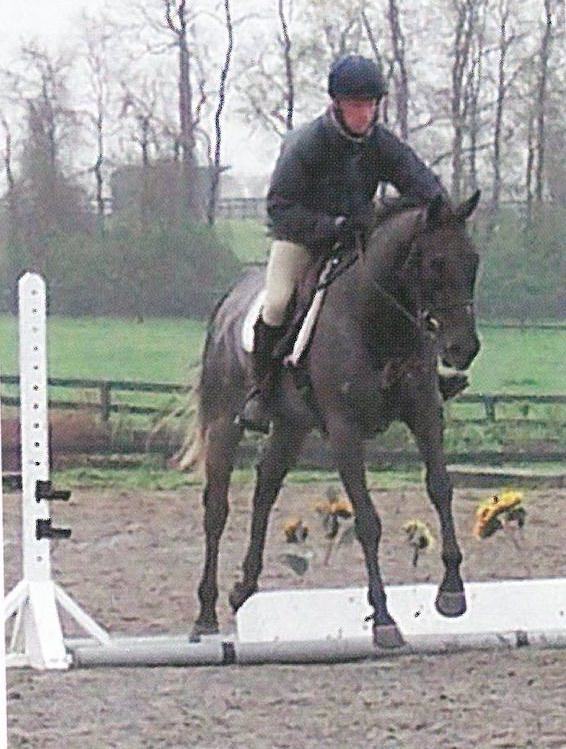
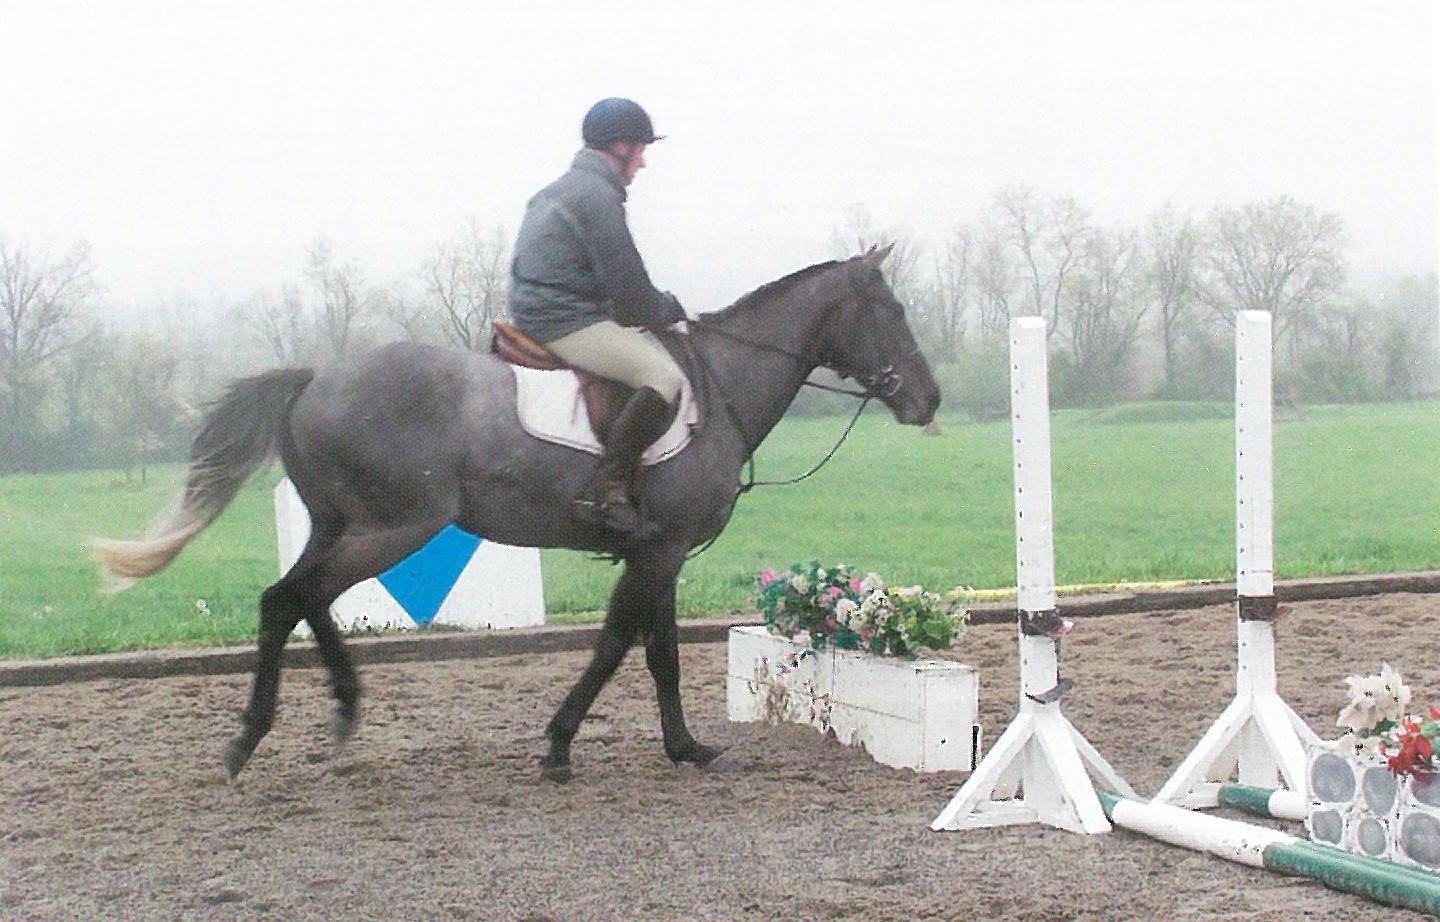
Having successfully negotiated the single flower boxes, I've now pointed Honor at what we will eventually turn into a vertical. For now, it's just poles on the ground and a flower box. As he showed a tendency to do earlier, he has drifted right and I am again trying to keep him straight with the open left rein and closed right leg.
Exercise 3: Trotting Two Boxes
When your horse is able to stay regular, straight, and calm trotting the single flower box, you are ready to add the second flower box. Now trot the first flower box in the opposite direction, which will point you on landing at the second flower box. For the time being, it is important for the horse to trot both boxes, staying regular, straight, and calm, from one to the other. If your horse jumps the first box quietly and lands at the trot, continue down the line to the second box. If your horse lands and canters after the first box, return to the trot before stepping over the second box.
With a very game, quick, or nervous horse, it may be necessary to trot the first box and halt immediately on landing a few times before continuing to the second box. With these horses, continue to trot the first box and halt until the horse realizes that every time you trot the box, all you are going to do on landing is halt. When the horse starts to think "halt" on landing, then you can continue to the second box.
If your horse is unimpressed with the first box, you should be able to keep the trot all the way to the second box. Hopefully, your horse will trot both flower boxes staying regular, straight, and calm. That's the goal, first one box by itself, then two in a row, staying regular, straight, and calm.
While regular, straight, and calm is the goal, most green horses don't make things that easy for us. In fact, it's more likely that when a green horse sees the second box directly in front of him and only a few strides away, he'll most likely ask, "Who me? Jump two in a row! Are you nuts?" Of course, he won't say this in plain English, but the equine equivalent by slamming on the brakes, cutting right or left, or bolting off altogether. Your job is to stay in the middle of him, in the tack, holding the breastplate if necessary, and continuing to encourage him forward with a bit of leg, some steering, and encouragement with a cluck or tap of the stick on the shoulder. Don't expect perfection. Remember that going this direction, the flower boxes are framed in on the right-hand side by the vertical and oxer, which means that if your horse is going to go anywhere other than over the boxes, it will probably be to the left. Consequently, make sure to have your stick in your left hand.
As with the first flower box by itself, continue back and forth from one box to the other focusing on keeping your horse regular, straight and calm. Don't panic if things aren't perfect the first few limes. If your horse tries to run past one of the boxes, stop him, move him over from your leg on the side he was running to, and try again.
Remember, you can make a horse better on the take-off side of a jump by correcting him on the landing side of a jump. If the horse is quick in front of the boxes, halt after the boxes, even in between the two boxes. If the horse is hesitant on the take-off side or jumps way up in the air repeatedly, land and go forward for a few strides, encouraging the horse to think forward and stay in front of your leg. Throughout all of this, remember, the goal isn't for you and your horse to be perfect, it's for you to be better after doing the exercise for 10 or 15 minutes than you were before you started.
Here I have turned around and jumped back into the line of flower boxes. This particular flower box is only about five feet from left to right, a very narrow face that requires a horse to stay focused and straight. Honor has tried to drift right, which is to be expected since the standards will keep him from going left, and I am trying to keep him straight by opening my left rein and, though not visible in the picture, closing my right leg.
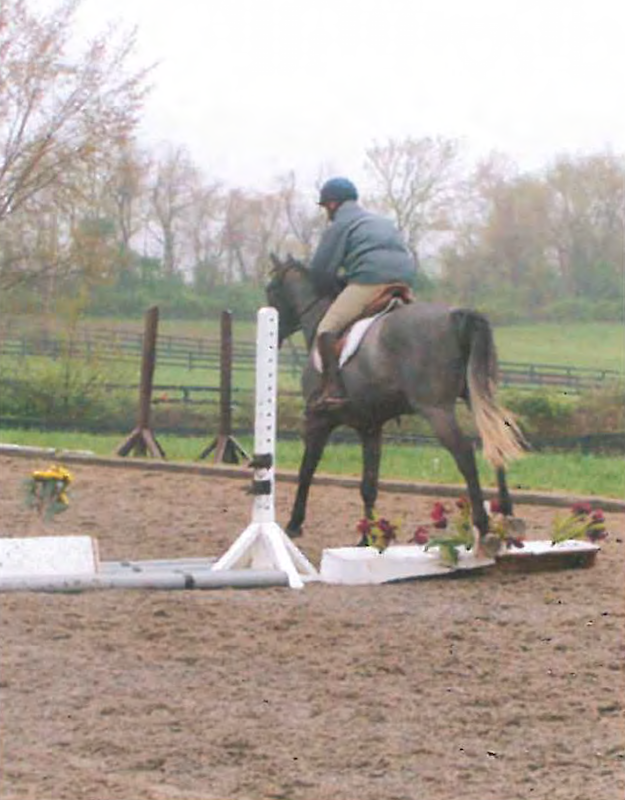
My correction over the previous box kept Honor straight down the line and he jumped this box, which is somewhat smaller in height, perfectly in the middle. Again, because he is not a forward-thinking horse, I am already encouraging him to move forward and to canter away.
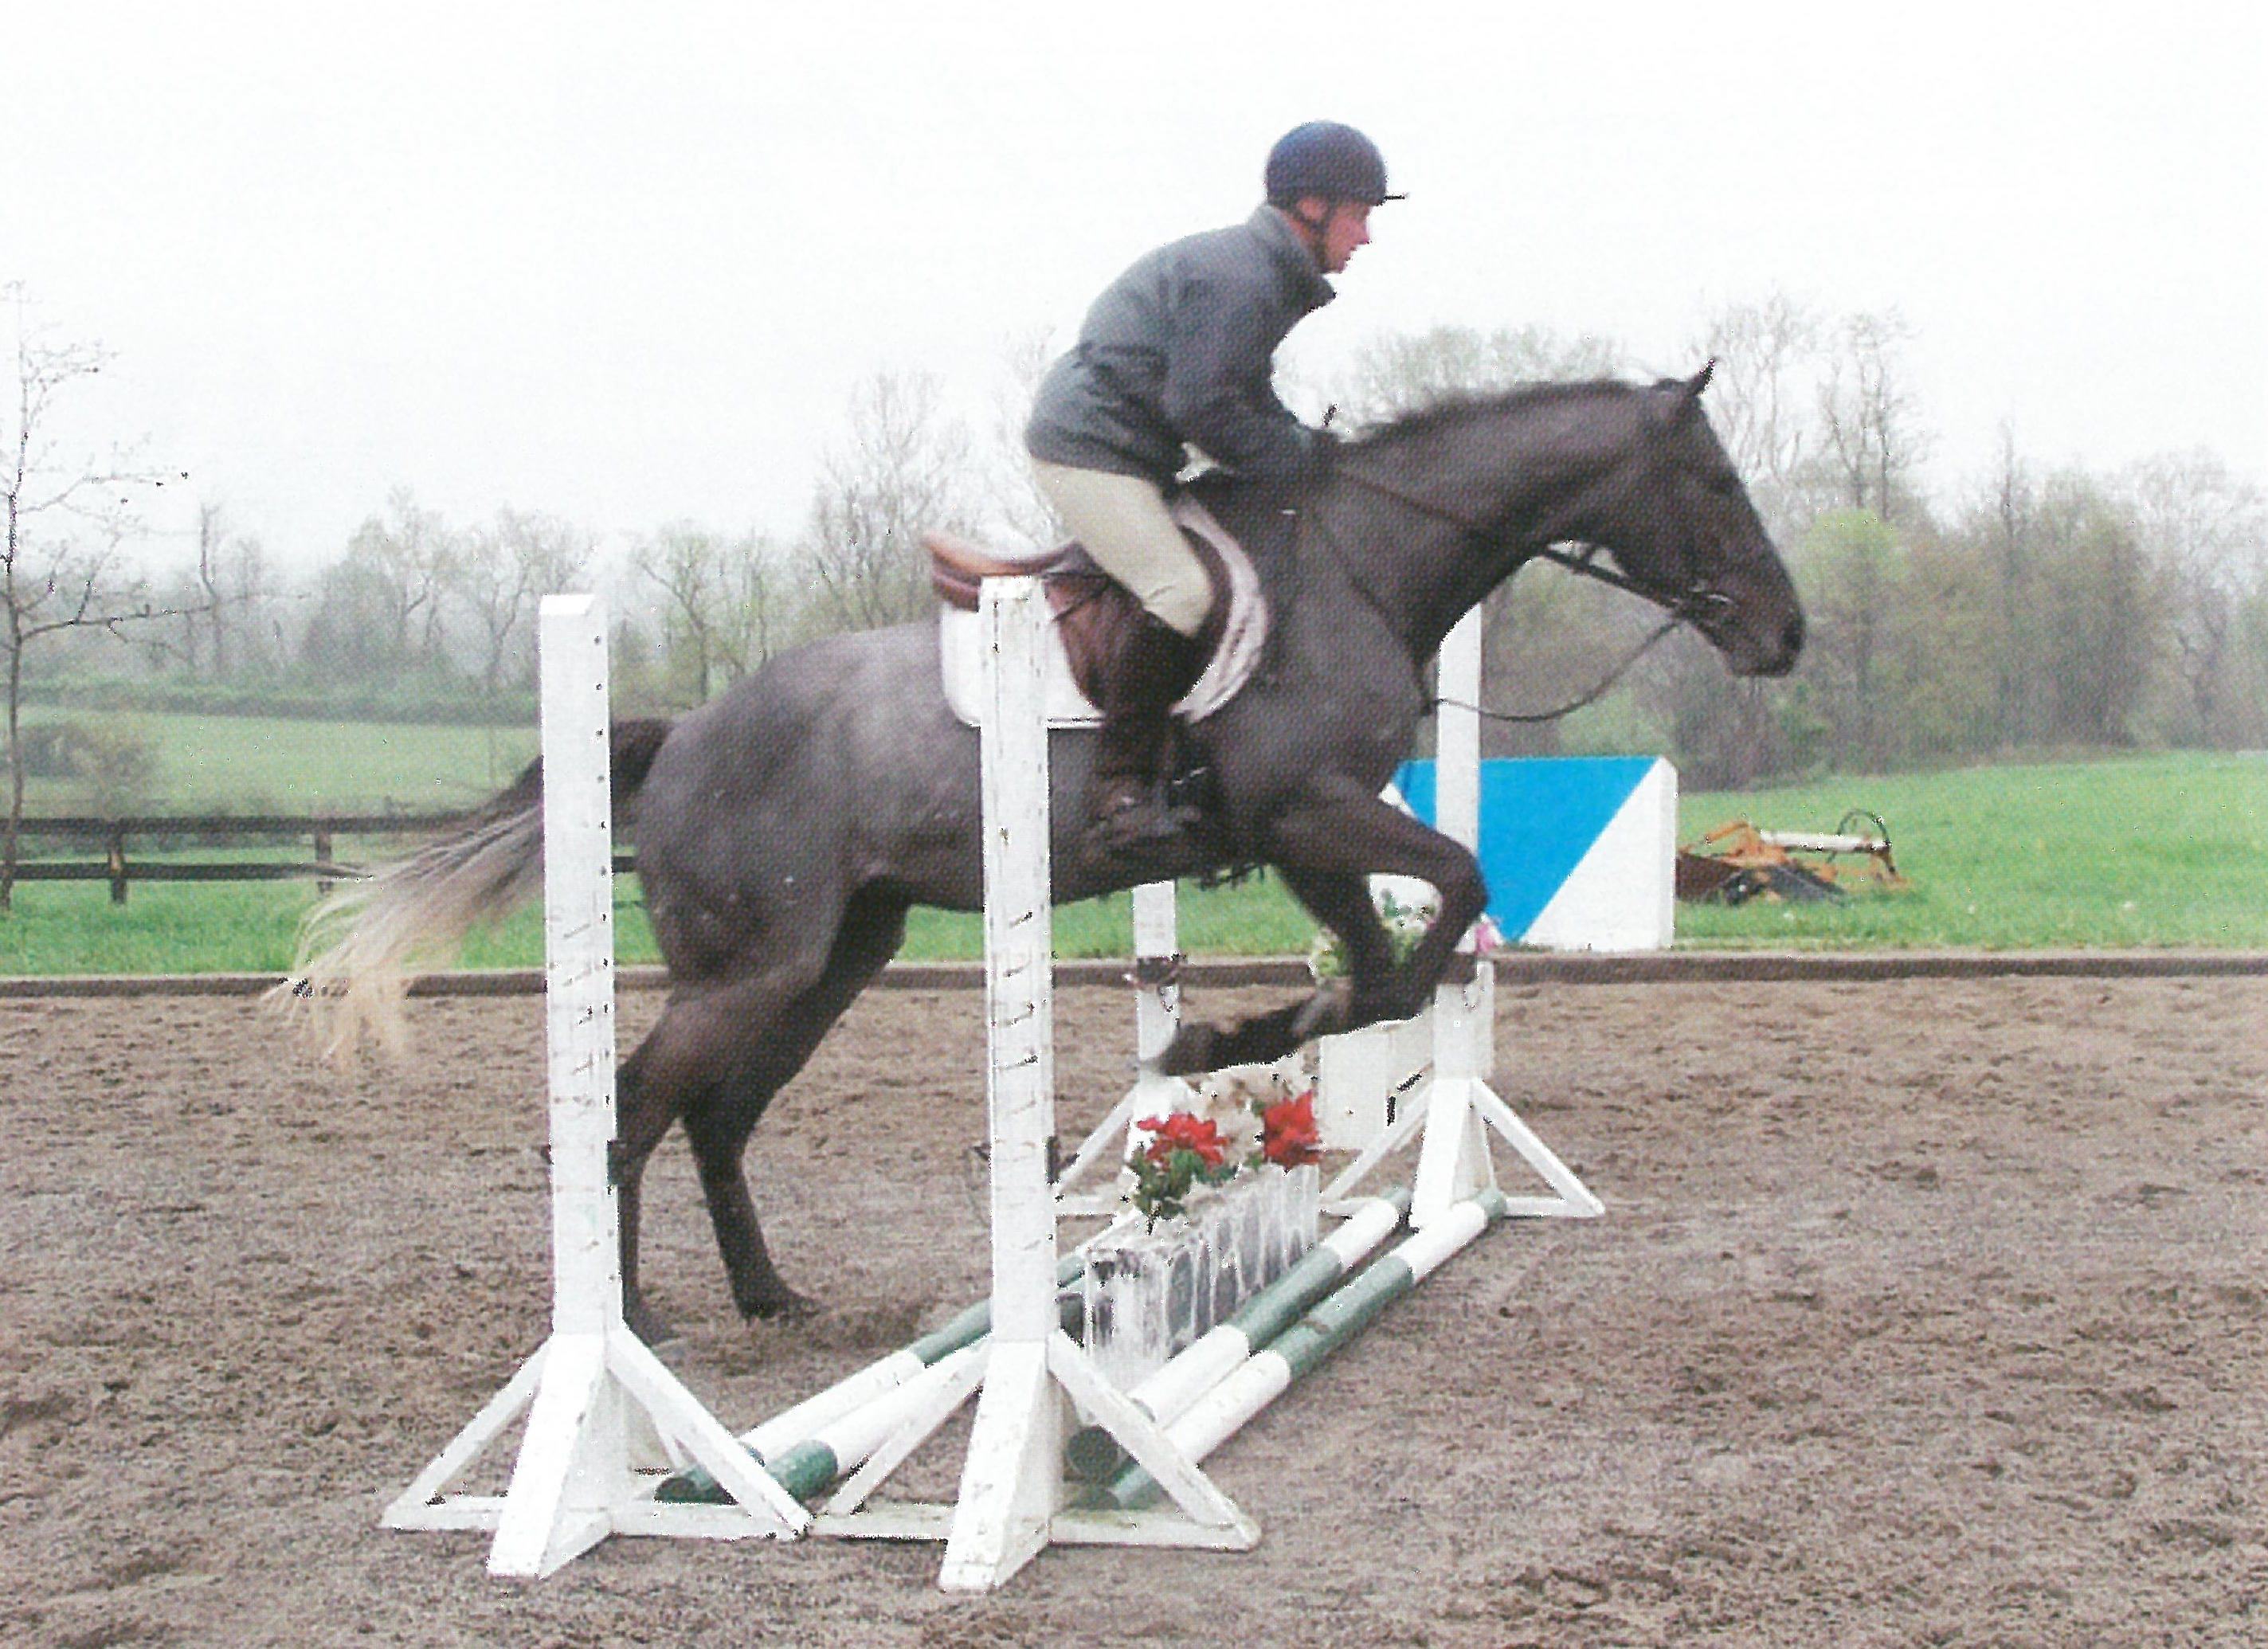
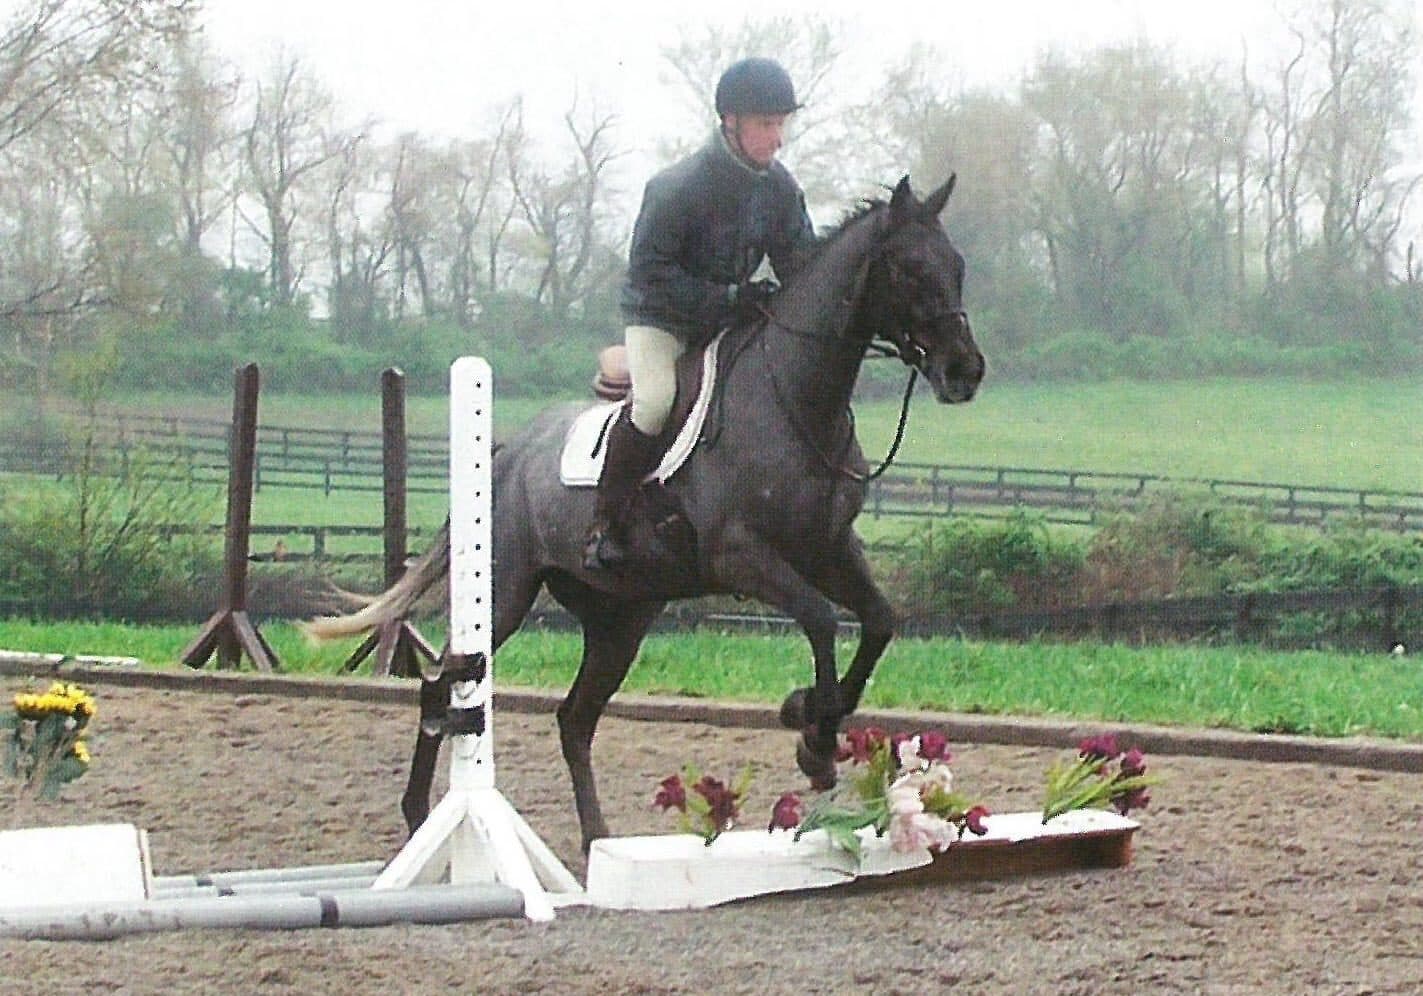
My correction over the introductory vertical has allowed us to get to the center of our introductory oxer. Honor is giving a good jumping effort here. Although he hasn't quite figured out how to raise his forearm as much as he will, he has planted his hind feet well and is trying to figure out how to use his neck, all the time wearing a pleasant, relaxed expression.
During this schooling session, which lasted at most 20 minutes, Honor figured out how to navigate the individual flower boxes and the introductory vertical-to-oxer line. In this picture, I have added the other oxer, which surprised him a little bit, and here he is jumping quite green. He is making a bigger effort than necessary, but more importantly, he is again trying to jump to the right a little bit. In the other pictures, it was easy to see me use an opening rein to keep him straight and to show him the way. This picture provides a good illustration of closing my right leg, from my knee all the way down through my heel, to send him straight. Note that the whip is still in my right hand.
These three basic exercises form the foundation for all the jumping that is yet to come in the horse's future. First on the flat, the horse must stay regular, straight, and calm. Then over a single box the horse must also stay regular, straight, and calm. Then you can add a second box, forming the first part of a course of jumps, while still staying regular, straight, and calm. Throughout your practice keep in mind that horses and riders learn best through a combination of repetition and trial and error. Allow the young horse to make mistakes, but continue the exercises until regular, straight and calm is the norm.
Next time we will add in the vertical, oxer, and canter.
The horse in these pictures is a 4-year-old gelding by Loyal Pal named Honor and owned by Rebecca Savage of Annapolis, Maryland. Honor was broke as a 3-year-old, which is a bit later than I generally like, turned out for the winter, and then sent to me to start back again this spring. Before starting him over jumps, I spent a week or so hacking him out. getting him to go forward from my leg, and making sure I could steer and stop. These are the most basic tools needed when pointing a horse at a jump, and I wanted to know that they worked before starling him over fences.
Did you enjoy this article? Want to receive Eventing USA straight to your mailbox? Members receive Eventing USA as part of their USEA Membership or you can purchase individual issues from the USEA Shop.
Related Articles
Galway Downs Selected to Host Inaugural Championships in the Western U.S. for the Intercollegiate Eventing Program and IEL in 2027
The United States Eventing Association, Inc. (USEA) is excited to announce that Galway Downs in Temecula, California, has been selected to host the first championships in the Western U.S. for the USEA Intercollegiate Eventing Program and Interschol...
The Path to Preliminary: How the USEA EA21 Program Helped Willow Schwartz with Her Eventing Goals
Since getting the ride on RH Finnegan nearly three years ago, Willow Schwartz has had the goal of competing successfully at Preliminary, and with the help of the USEA’s Emerging Athletes Under 21 (EA21) program the last two seasons, she and “Finn” have achieved that goal and more.
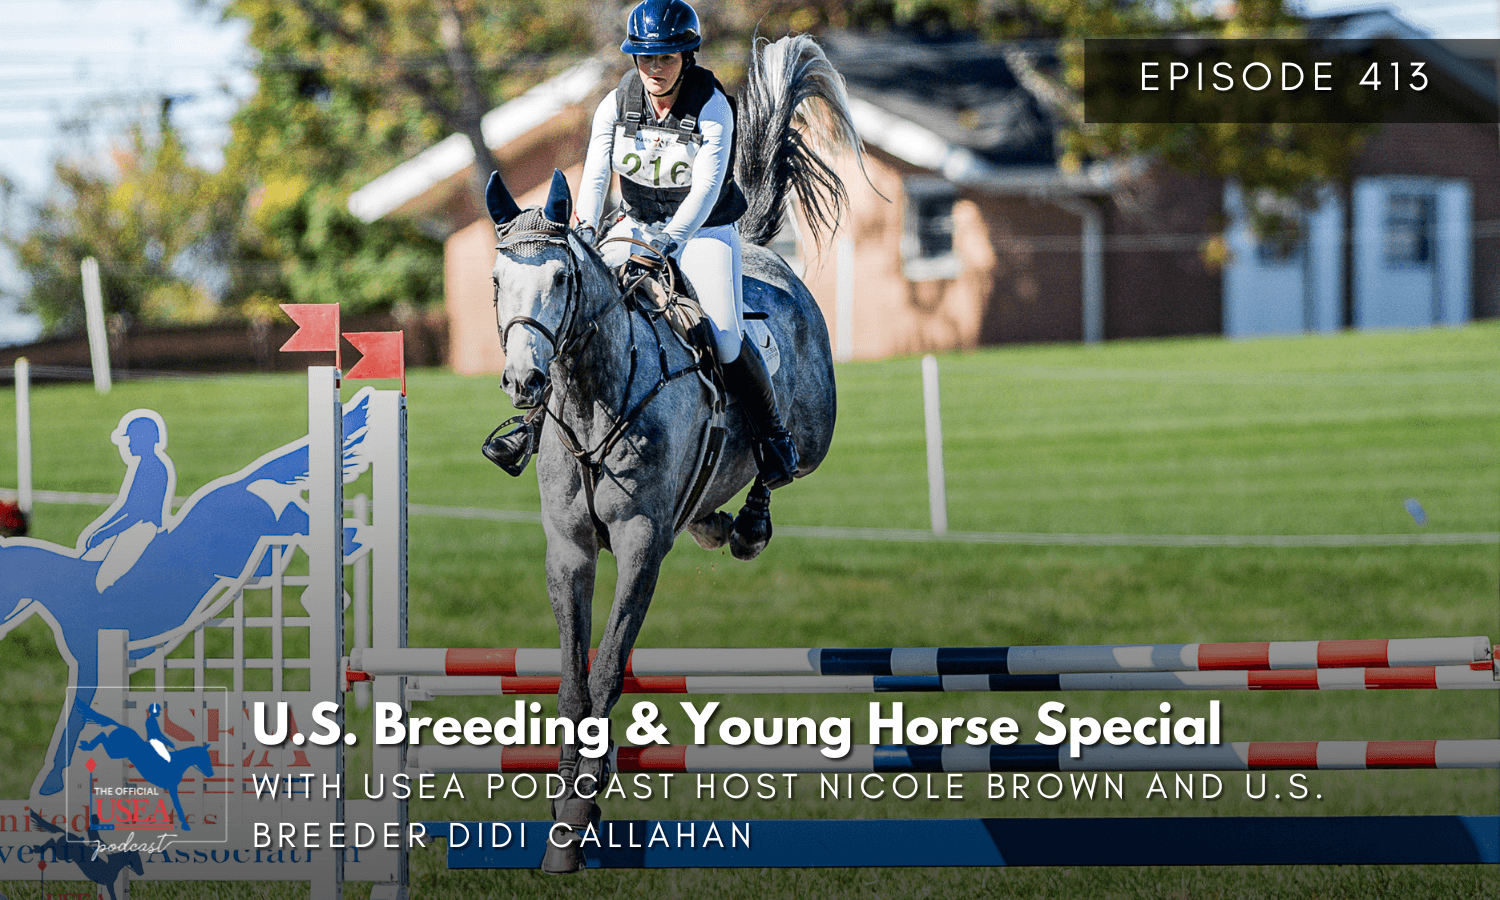
USEA Podcast #413: U.S. Breeding & Young Horse Special
This USEA Podcast episode celebrates sport horse breeding in the U.S. USEA Podcast host Nicole Brown sits down with U.S. breeder DiDi Callahan to talk about everything from selecting a sire, perfecting upon your mare, developing young horses, and more. If you have ever thought about giving sport ...