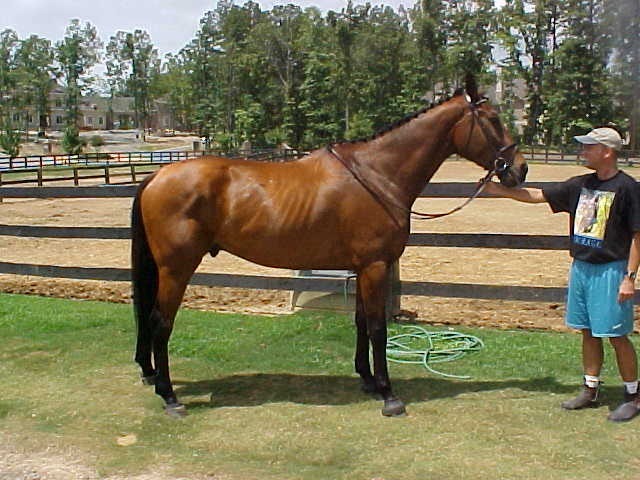
Instructions on how to create button braids. Accompanying photos are of Rhodes Point, a Thoroughbred gelding.
The Tools of the Trade
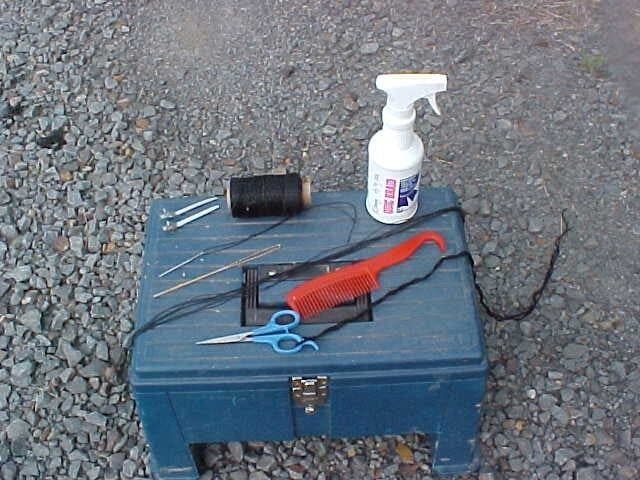
The first photo is my braiding box. I keep all of my braiding equipment in it, as well as my small clippers. It’s very handy as it also serves as a stool. I think I bought the step at KMart several years ago for around $30. It was pricey, but it’s good quality.
I use the grandma-style hair clips, black waxed thread cut into strips about 18″ – 24″ long. Note: I can usually sew in three braids with one strip of thread.
I use a large metal craft needle which, as you can see, has a scrap piece of waxed thread threaded through the eye and tied in a knot, making it easier to keep track of while stored. Also, it ensures the eye of the needle is large enough to easily accommodate the thread (very important).
I use the bigger gold pull through for pulling up forelocks.
You can use any kind of comb you like. I don’t know where I acquired the red comb, but I really like it as the hook at the end makes it easy to evenly part the mane.
Also, I use a LONG piece of yarn around one of the handles of my (very sharp) scissors. I then just loop this around my waist. Sometimes I wear an apron leftover from my 10-day stint waiting tables in 1994, especially if I don’t have a handy place to store my Quick Braid, though I prefer to hang the bottle on the wall of the stall simply to avoid heavy apparatus hanging from my waist.
I like the mane to be about 6 inches long, and pulled decently thin. Regardless of mane length, I use the 1/3 rule when parting the mane. If the mane is 6 inches long when pulled down taut, I part the mane at 2″ increments.
How you braid is important, too. I find that for braids I want to make “round,” braiding a little bit “out,” instead of “down” is easier.
Step 1
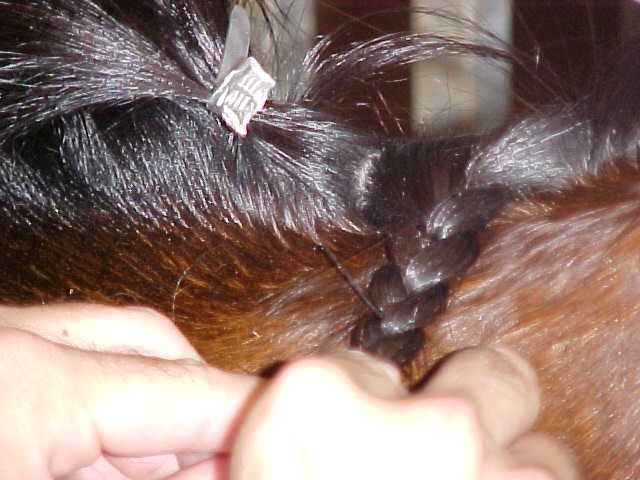
Spray with Quick Braid, comb through, then section off the mane, taking care to ensure a straight, even part. Think Marcia Brady.
Step 2
Braid down. How you braid is important. In these photos I’ve not used the “leveraged thumb” method, as with rounder braids, I find they’re not quite as “round” when I sew them up. This is the standard twist your wrists method of braiding. Just make sure when you get to the bottom you hold it tight.
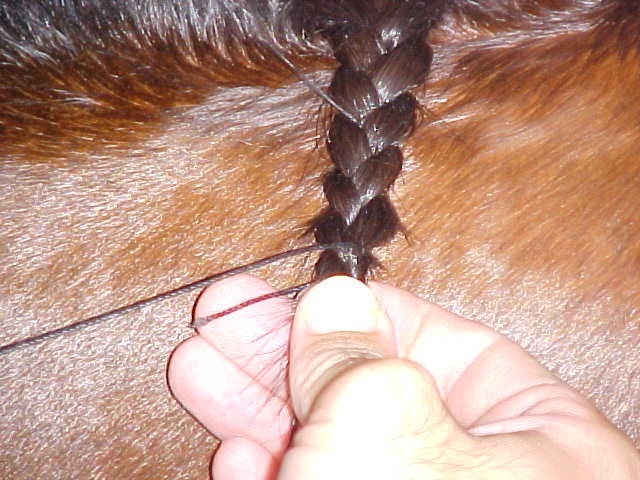
Step 3
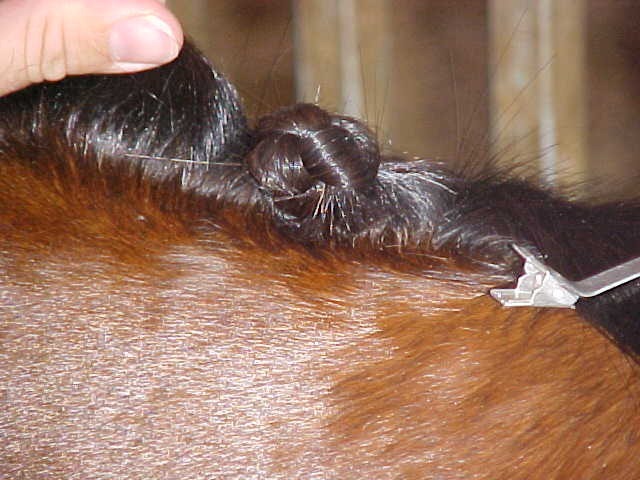
When you’ve braided down, take your threaded needle (I always keep it in my mouth, with about 4″ of bight) and sew through the bottom of the braid, leaving about 1/2 inch of thread on the back side.
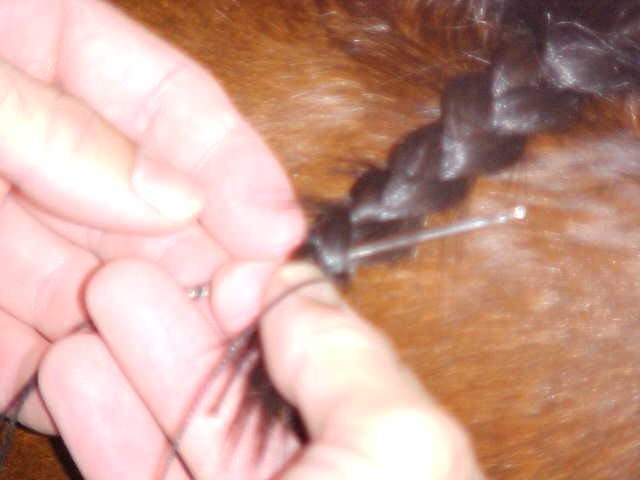
Step 4
Then wrap the thread around the bottom of the braid, push back through once from underneath to the top side, and sew in a 1/2 stitch. At this point, your braid is secure and ready to sew up.Using the needle, push through under the braid, at the crest, once. Pull it up, and you’ll have a single-folded braid.
Step 5
You can continue to sew under/in from either side, until the braid is as tight as you want it. I always find once each way to be sufficient. Again, sew in a 1/2 stitch at the top on your last pass, at the top of the crest. Then snip off with scissors. This finished braid isn’t my best in the world. At the bottom, I could’ve threaded better to make it a little more of a ball. Try to sew in as close to the bottom of those double folds as you can. This will make your braid really round.
In this photo, Rhodey is wearing 13 braids, but could wear 14 if/when his longer bridle path grows out. If I were braiding a horse for a three-day, I’d pull the mane to more like 4 inches, and I’d try to put about 20 braids in. For the forelock, I (french) braid like a hunter. I prefer to keep the forelock pulled well enough that you don’t have to sew in a ball on the end but, if yours is too long, you can certainly do just that, following the steps I outline above. You can do this with a french braid that is too long to slide under the ridge (like a hunter) or, if your horse doesn’t have much forelock, you can skip the french braiding all together and treat it as if it’s just another section of mane. Feed your pony lots of carrots and tell him how good he is! Like Rhodes Point is, here!
About the Author
Once an active adult amateur competing through Training level, Robby Johnson now spends his time working as a marketing communications professional for a private land resource organization in Tuscaloosa, Alabama, and providing both group and private sessions as a certified STOTT PILATES™ instructor. He has groomed at several three-day events (the most memorable being the Radnor CCI** in 2002 – the year of the rain and dreaded “E” box) as well as provided braiding services at many horse trials in Area V. “Though I’m not riding now, I still love the sport and hope to return to eventing in some capacity one day soon,” he said. “Also, I am not nearly as fat now as I was in this photograph.”
Rhodes Point, purchased by Johnson in March, 2002, through an ex-racehorse referral service in Harrisburg, Pennsylvania, was successful at both Novice and Training with Johnson, winning his Training level debut and scoring a “10” on his final halt, as well as helping to secure the first-place Novice team ribbon at the 2005 Chronicle of the Horse Adult Team Championships. He was sold in December, 2006, and went onto a successful career at Preliminary and Intermediate levels. These photographs were taken approximately 90 days after his arrival in Arkansas, where Johnson lived from 1996-2006.
We were thrilled to welcome USEA Grooms Committee member and five-star groom Christina Curiale at the 2026 USEA Intercollegiate & Interscholastic Eventing Championships for a Q&A session over all things horsemanship and grooming! From braids to nutrition to post-competition care and more, Christi...
On June 3, 2026, the U.S. Department of Agriculture confirmed New World Screwworm in the umbilical area of a calf in Zavala County, Texas. This expansion into the United States is alarming and US Equestrian wants to make sure you know about the potential risks of this parasitic fly to horses. ...
This excerpt from "Finding Purpose: A Life Managing the Passion, Compulsion, and Borderline Addiction Called Horses" by Chelsea Canedy, is reprinted with permission from Trafalgar Square Books.